Saturday, August 4, 2007

Fitting Entrance Door

Having done a little to restore and bring our 2nd hand oregon pine front door & frame back to life and full potential, we put her in..

Wow, doesn't she look great..?

You can now sort of get the idea or the concept of the design.. to have the front door of the house open up and then you can look straight through the house directly onto the distant view and more specifically onto Rhenosterkop.

Rhenosterkop is the pinnacle of our Nature Conservancy, the Rhenosterspruit Nature Conservancy. Rhenosterkop sits in the centre of the conservancy and features prominently on our logo.

Thursday, July 26, 2007

All Help Welcome

We now start getting some of our stored 2nd hand window and door frames ready for installation into the house.

Sonia and myself have spend a lot of time over the last year and a half finding nice, used and sometimes abused 2nd hand building materials.

Like this lovely used Oregon door frame.. it is already in prity good nick.
All it needs is to be sanded down and then treated with ProNature Outdoor wood finish.
ProNature paints and wood finishes are non-toxic, eco-friendly paints.

It looks like one of our horses, Collin is his name, is keen to get involved.
Thanx Collin, we Love You!!!

Tuesday, July 24, 2007

Mud To Walls

The walls of the house and some of the rooms are starting to take shape.
I must admit the raising of the cob walls is taking longer than I expected.
Be warned..
Cobbing is a labour intensive process.
The other things is.. it is consuming a lot of my harvested soil.
By the way, I dug a number of holes on my property to harvest the building material, commonly known as soil. The Americans call it dirt.
I dug a few holes namely: a few dams and a swimming pool to harvest my soil.
Now that the walls are starting to look like something, we can't wait to move in.

One of the tricks in building cob walls for a kitchen or similar room where you will need built-in-cupboards, table tops, etc., is to embed a wooden plank into the wall. This allows the cupboards to be anchored to the wall using self tapping screws or nails.


Sunday, July 8, 2007

Cob Walls Get Started


The house is being built in two phases:
Phase 1. Centre & West Side (Guest & Living Area)
Phase 2. The East Side (Family & Quiet Area)

Cob walls (mud, clay & straw) have started going up on the east side which includes: kitchen, hearth, gym, laundry, guest toilet and then upstairs we have two guest rooms with on-suite bathrooms.
We will move in after completion of Phase One and then complete Phase Two.

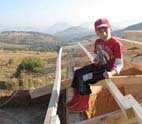
So, on top of the finished stem walls (the house's boots) we put DPC (damp proof course) and then on top of that we place the cob walls.
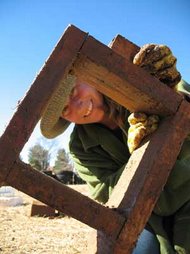
We are using the iBuild cob former, which is a device used and pioneered by Insynch Sustainable Technologies to speed up & simplify the earth building process.

The walls are 560cm thick at the base and slowly reduce in size as we raise the wall upwards. We reduce the width of the iBuild by aprox. 2cm per building line to give us the sloped walls. The inside walls are 100% verticle and the outside walls sloped. The sloping aids in rain water run off and maintains wall strength and integrity.
The internal walls are not sloped as this would make life difficult when furnishing the house.

When mixing cob, one needs to employ a certain amount of soil science to ensure the composition of the mix is structurally sound. The mix is made up from a variation in soil aggregates, 5 to 20% clay (this varies according to the soil type), water and straw. The clay acts as the binder, serving the same role that cement would in a conventional building and the straw gives lateral strength, similar to builders brick force (i.e. wire). I will post a more detailed explanation to this science some time soon and I will also discuss the cob mixing process.

Thursday, June 14, 2007

Stem Walls Are Done


Stem Walls are done using new rock-face clay bricks, recycled stock clay bricks and some maxi bricks.
Due to the width of the cob wall at the bottom (560cm), the stem walls have to be wide enough to support them.

Thus we opted for building up the stems with single brick lines on the outside & insides and then filling them with either compacted soil or building rubble.

Next we put a lime topping to prepare a level and flat surface to lay the cob walls onto.

Note: the excess soil removed from the foundation trenches has been sieved and is ready for conversion into building material (i.e. cob). We decided to leave the soil where it is, so as to not have to waste energy to take it away only to have to bring it back when building. So, the soil is piled up nearby and the rest of the spaces are back-filled with compacted building rubble.
Earthen Floors will be put in later.